
Lacy Homemade Headband
Hi again, my blogger friends! I had an AWESOME weekend...my parents were in town, my sister and her fiance are back in the city, and I had great time celebrating a wonderful friend's birthday at dinner last night! With all of the excitement, I did not have a lot of time for crafting!
I decided to take a chance on a simple project I dreamed up on Friday! I have never sewn lace and have very little experience with elastic. And I have to say, it turned out GREAT!!!
Here's a picture of the finished project on!

Does that material look familiar?? Yup, you spotted it; it's the leftover lace from last week's wine bottles! Now, before I get started, I'll just tell you that this project is GREAT for using leftover material, so if you don't have lace (or that's not your style) just substitute any left over material...OK here we go!
First, gather all of your materials! (It's a sewing project...Sorry to you non-sewers!)
 |
| sewing machine, matching thread for spoon and bobbin, material, elastic, measuring tape, scissors |

By the way, I used the natural lines in the lace to make sure I cut a straight line. If you are using lace or another material that has straight lines, make sure to use them! Got to love sneaky short cuts!!!

Now, fold the strip in half "hotdog style" (haha...teacher term for the long way) and sew as CLOSE to the edge of the lace as possible.

OK, next, you need hide your sewing. You need to flip your tube inside out. This would be the annoying step for really thin headbands. Stick your pinky inside and pull the material with you pinky.

Once you have the material flipped, you are going to hide your messy ends. Step 1: try to flatten your tube so that your sewn end will make one edge of your headband (it still might look a little tubular, that's ok). Step 2: Fold one end over about a half inch. Step 3: To hide your messy edge, fold it over again. Let's call Steps 2 & 3 a burrito fold (I love food references). Then sew back and forth, using the back stitch, parallel to the edge of the material. Repeat on the other end.
 |
| Step 1 |
 |
| Step 2 |
 |
| Step 3 |
 |
| Finished |
For my whoppa head, I needed about 2.75 inches. You may need more or less depending on the size of your head and how long your material is. You want your elastic to be snug to your head, or else the headband will fall off.
NOW STOP! Don't cut the amount of elastic you need. Cut one inch more. This way, you will have a half inch on either side to sew onto your material. OK, you can cut now. Sew your elastic onto your material. Sew back and forth SEVERAL times. Remember, this is holding the headband on your head.
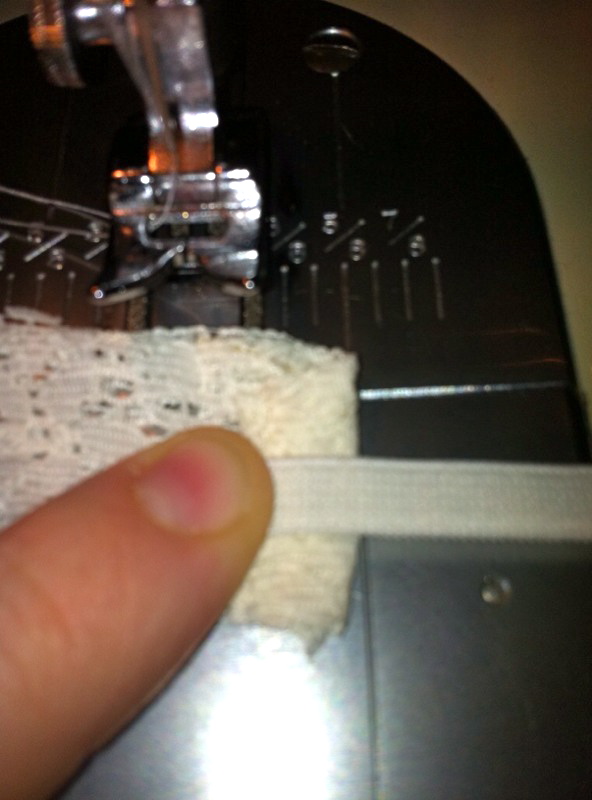
Repeat on the other side. Make sure your elastic isn't twisted, or it won't be comfortable to wear.
And, here's your finished product!!

Sewing projects require a little more explanation (thus the longer post), but if you are at all familiar with sewing, this is a really easy project. Start to finish, it took me under a half hour.
So, there are some ways you could change this project. Like I said before, if you don't have lace/don't like lace, use another material. Also, if you want a thicker or thinner band, that's easy to adjust!
Also, since this is such a scrap using project, if you don't have elastic at home (or don't feel comfortable using elastic), you could just add about another foot of material (or so) onto the ends, and tie the material together at the bottom (like a scarf). I think that would look really cute and will probably try it soon!
Next week, I'll try to go back to a non-sewing project for all my non-sewing friends!!
Until then, keep crafting!
SB
No comments:
Post a Comment